
We repair most mobile devices, so if do not not fancy doing this repair yourself, we are mobile, as in We Come To You and we can do your iPhone 7 Screen Repair / Replacement any where in Bristol, Bath, Keynsham and Portishead. If you are not local to me, you can always search “iPhone 7 Screen Repair / Replacement Near Me” for local google Apple iPhone Repair Shops / Stores results.
You will need the following tools and spares:
- A new screen for iPhone 7
- Plastic triangle opening tool
- Nylon spudger
- SIM card opening tool
- Fine tip curved tweezers
- Flexible opening tool or precision knife
- Professional phillips screwdriver
- Professional iPhone pentalobe screwdriver
- Professional tri-point screwdriver
- Hair dryer or heat gun
- Suction cup
Preparing Your 7 Screen Repair / Replacement
First let’s prepare the phone so that you do not create any further damage whilst repairing your device. Cover the back of the phone in tape, you do not want to scratch the back of the phone on shards of glass. To minimise the amount of glass that will end up on your work surface, if the iPhone 7 cracked screen is badly damaged, place adhesive tape on the screen as well, masking tape or bog standard packing tape will do.
A Word of Warning
Make sure you keep your screws organised, should you not know so which screw goes where you could easily insert a long screw into a place where a short screw should go. This will result in the screw piercing the circuit board essentially creating a very expensive paperweight, substantially increasing your iPhone 7 screen repair / replacement cost. Also iPhone screens are relatively cheap, so do not even waste you time cutting corners and searching iPhone 7 Glass / LCD Replacement / Repair, if it was a Samsung Screen Repair or a Huawei Screen Repair, yes, as they are a lot more expensive, but do go for the best iphone screen replacement brand you can find.
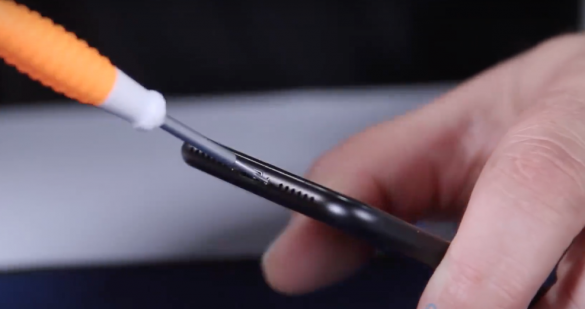
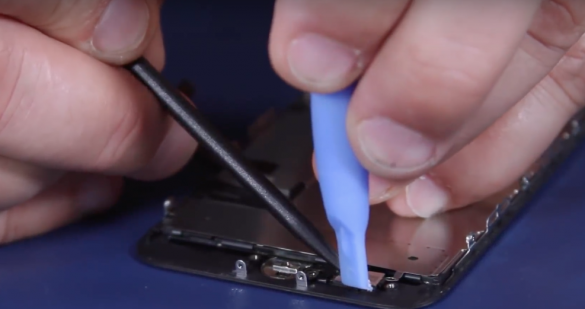
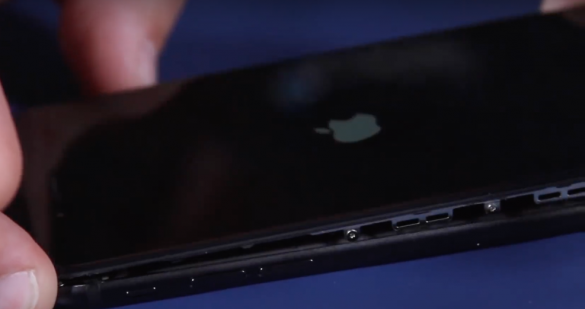
Start off by turning off your iPhone, remove the two to bottom pentelow screws next to the charging port. The screen is held in place with adhesive, heating this adhesive will make lifting the screen a whole lot easier. Using the hairdryer / heat gun, heat up the screen so that you can still touch it. If the screen is not cracked near the home button, use a suction cup to pull up on the screen. Using a flexible opening tool or the precision knife, create a small gap between the screen and the frame just enough of a gap to insert the plastic triangle opening tool.
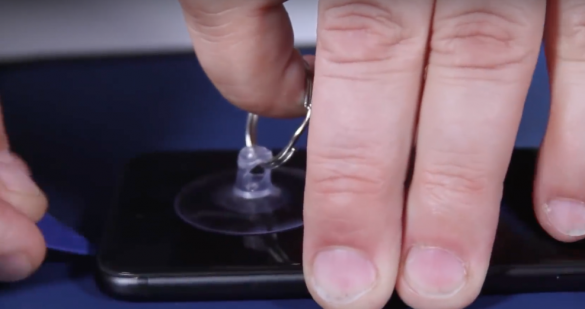
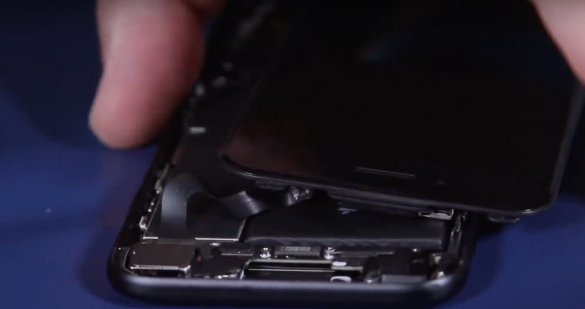
Slide the plastic triangle opening tool down the left hand side of the screen carefully slicing through the adhesive. Before you continue to the right hand side bear in mind there are cables close to to the edge of the phone on this side. Once you have the right hand side slightly lifted, hold the screen on the sides at the bottom (where the home button is located) and gently break the glue at the top of the screen by wiggling the screen back and forth so that the top edge becomes free from the frame. Do not use too much force as you do not want to tear the cables which attach the screen into the main circuit board. The screen now opens like a book with the right hand side being the spine of the book.
Disconnect the Battery First
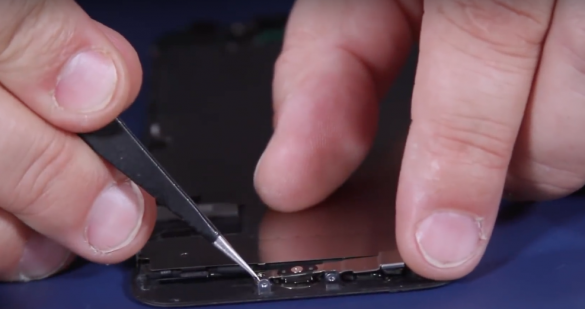
Using the Tri wing screwdriver, remove the four tri point screws that hold down the battery connector and screen cable securing bracket in place. Keep the screws organised as they are all different lengths. Using the plastic spudger, gently pry the bracket off of the connecting cables and set it aside with a pair of tweezers. With the bracket removed use the plastic spudger to lift the battery connector first. Always disconnect the battery first, so you do not accidentally cause a short. Bend battery connector back slightly away from the circuit board. Now disconnect the two screen cables with the plastic spudger. Be careful not to dislodge any tiny components that are located around the screen and battery connectors.
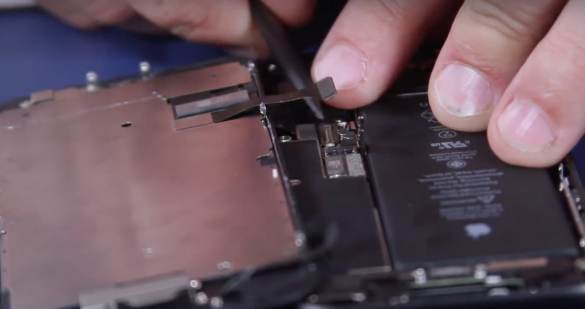
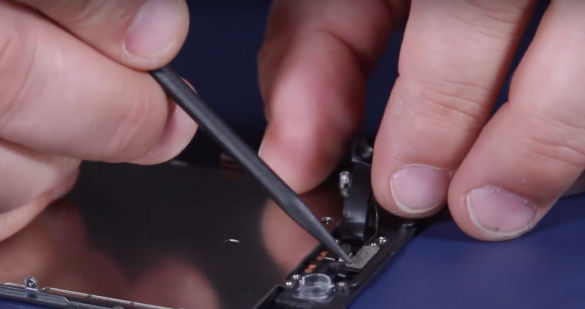
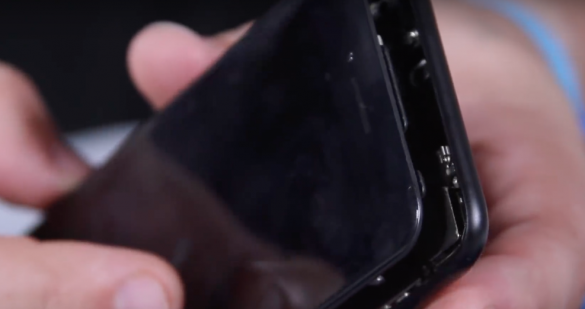
Disconnect the Proximity / Front Camera Flex
Using a star screwdriver, remove the two screws that hold down the plate securing the upper screen proxy, speaker and camera flex cable. Using the plastic spudger, gently pry the bracket off of the connecting cable and set aside with a pair of tweezers. Disconnect the cable from the phone. which will free the screen from the phone casing. Set the casing aside so you can work on the screen.
Working on Your iPhone 7 Cracked Screen
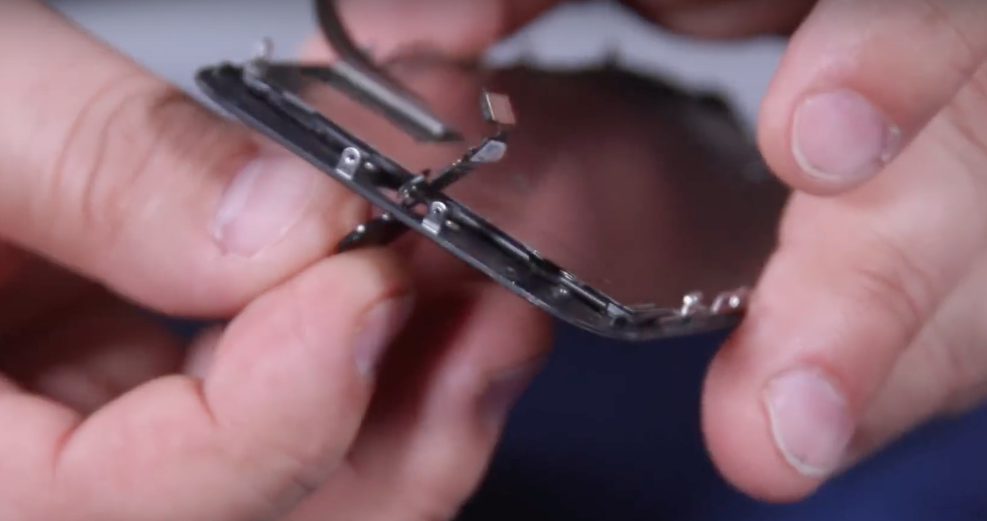
Start by removing the ear speaker retaining bracket it is held in was 3 Phillips screws, remember to keep your screws organised. Lift the bracket with a pair of tweezers and set aside. Fold back the front camera taking care not to touch the camera lens. Remove the two phillips screws holding the ear speaker to the screen, now remove the ear speaker. Next you will remove the proximity front camera flex cable. Word of warning, if you damage this flex cable, you will need to buy a new one. Some of the senses are held in with brackets and glue. You will need to heat the front of the screen so that the sensors do not get damaged when you try to pry them out of their positions and off the screen. Heat the front of the screen, so that you are still able to touch it, then gently try the flex off of the screen. There is one screw left over that needs to be removed which is the ear speaker ground screw.
Time to tackle the iPhone 7 Home Button
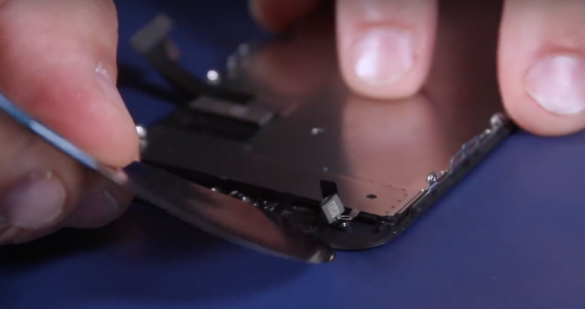
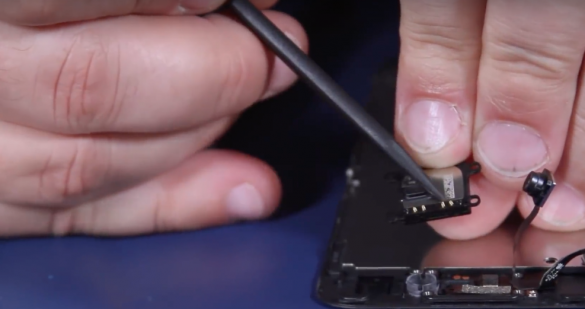
Be very very careful, if you damage the iPhone 7 home button you will have to get an Apple Store to program a new button to your main phone circuit board, as each button is unique to each device, this will substantially increase you iphone 7 screen repair / replacement cost, to the tune of hundreds of pounds. Using your tri-wing screwdriver remove the four Screws holding down the home button bracket. Remove the bracket and set aside. The iPhone 7 home button connector is not secured or glued down so it is easy to tear the home button flex when disconnecting it. Use one spudger to hold the home button screen cable down whilst you use another spudger to pry the connection open.
Move the screen home button cable out of the way. The home button flex is glued to the screen, be extremely careful with this next step, the home button has a microchip (Turtle IC) soldered onto the home button flex. It is vital that the flex is not bent in any way when removing the home button as this will break the contact between the Turtle IC and the home button flex. Turn the screen over and apply some heat just as before to soften the glue before you attempt to remove the home button. Using the Flexible opening tool lift the home button flex carefully.
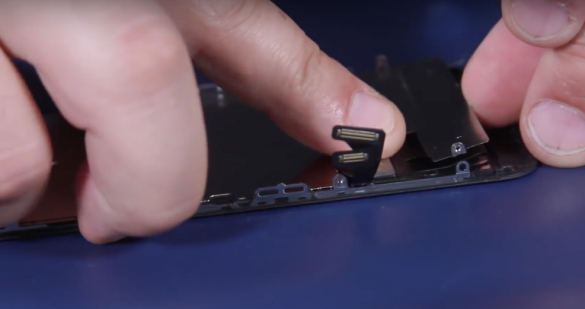
Once you have the home button flex slightly lifted you can use the plastic spudger and a little bit of alcohol to release the rest of the home button flex. The home button is removed through the screen.
Removing the Backing Plate
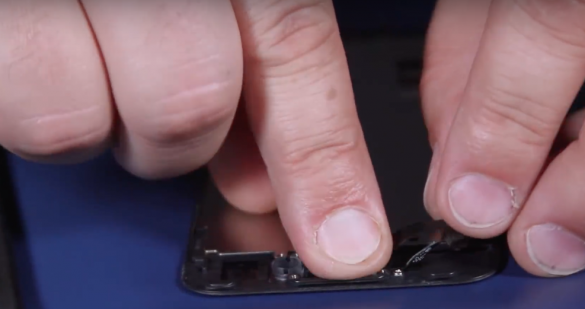
Now remove the six tri-wing screws holding the backing plate in place. Place your finger behind the screws, so you do not bend the securing clips. Before you lift the backing plate, take your flexible opening tool or your plastic spudger and pry the cables which are stuck to the backing plate close to the iPhone 7 home button hole away whilst lifting the plate off the screen. You are finished with your iPhone 7 cracked screen, but don’t bin it yet.
Rebuilding the New Screen for iPhone 7
Start by holding down the cables on the new screen for iPhone 7 and then place the backing plate onto the back of the screen, but keep the the bottom of the plate close to where the home button would be installed a little elevated, this is where the adhesive is on the back of the plate. Now install all 2 of the tri-wing screws at the top of the plate. Whilst holding down the screen cables lower the plate and apply a bit of pressure to get the glue to stick to the screen cables. Install the rest of the tri wing screws.
Reinstalling the iPhone 7 Home Button
Before you start installing the home button, take a small piece of adhesive tape and tape the backlight home button screen connector up and out of the way so that when the home button flex is installed it is not in the way. Be gentle with this flex and do not bend it more than you have to. Pass the home button through the home button hole, it should sit flush with the screen.

Ensure that the home button flex is lined up on the underside of the screen so that the plastic pin lines up with the whole on the home button flex cable. Once the iPhone 7 home button flex cable is seated back on the screen, remove the tape holding the backlight home button screen connector flex and connect both connectors together. You should feel a gentle click when the connectors are seated correctly. Now replace the iPhone 7 home button securing bracket, ensuring the bracket is on top of the tabs of the backing plate and lined up with the backing plate pin. To avoid the home button from dropping out, install the tri-wing screw into the home button first and then the other 3 to hold down the securing plate. Do not over tighten these screws or you will cause the home button to malfunction.
How to Connect Screen Cables
Using one finger, place the connector on top of the connector block, very gently wiggle the connector back and forth until you feel the connector seat into the connector block. Press down gently and you will feel the connector click into place. Do not push hard or force the connector into the connector block as you may damage the connector block the connector cable or dislodge surrounding components.
Screen Testing – New Screen for iPhone 7
It is always good practise to test your components as early in the repair process as possible, who knows where you bought your new screen for iPhone 7? With the battery still disconnected, connect the 2 screen cables and then the battery. Resting the screen on the iphone casing, power on your phone. Provided your screen is good and the home button has not been damaged, the phone should boot fairly quickly. Enter your code. If you do not get a message “Unable to activate touch ID on this iPhone” your home button is working. If you do get this message, test to see if the home button is still working, you may have only damaged the Touch ID feature. If you phone takes a long time to boot, there is either something wrong with the home button, the screen or the flex connectors.
Try these fault finding steps:
- Disconnect the battery and the screen connector cables
- Inspect the screen connectors and the circuit board connectors for damage, dirt or to see if the connectors are bent. Clean with a small brush or compressed air if you find dirt. Straighten bent connectors.
- Reconnect the screen, reconnect the battery, Retest
- If the problem persists, if the original screen still works transfer the home button back to the original screen, reconnect and test. If not, you will need another screen to use to test, or take it in to a shop to be fixed.
- If the screen works then the problem is not iPhone 7 home button, but your new iPhone 7 screen.
Installing the Proxy Flex Cable on the iPhone 7 Screen
Start off lining up the speaker contact pins, with the holes on the flex cable. Now install the proximity sensor into the proximity sensor bracket and then the light sensor with the rubber boot into its location next to the proximity sensor. Push down to ensure that both of these sensors have seated correctly. If one of the sensors is not seated correctly you should be able to feel a raised area. Relocate the sensors to ensure that they are installed in the appropriate location. If these sensors are not installed correctly the screen will not go blank when pressed against your face and this will use extra battery power as well as cause interference with your phone call by your face activating parts of the screen while you are talking, such as the mute button or the dialing pad.
Install the ear speaker taking note that the springs are aligned with the speaker contacts, note that the speaker fits into a slot. Once in place install the two speakers screws. Now fold the main camera over the speaker and seat it into the camera bracket. Holding down the camera, place the main proxy flex speaker bracket into its correct location and insert the screws in exactly the same place as they were removed from.
iPhone 7 Glass / LCD Replacement / Repair – Connecting the Screen
Connect the Proxy / Front Camera Flex cable. Place the screen flat on top of the iPhone case. Using a pair of tweezers, line the connector block up and press it into place. Now open the screen so the right hand side acts as a hinge and connect the side screen cables and the battery.
Test the iPhone 7 Proxy / Camera Flex
Gently allow the screen to rest on top of the phone casing, holding it in place with on hand. Switch on the phone. Once the phone has booted / started, enter your code and test the front camera, test the ear speaker by dialling on the telephone keypad (make sure volume is on full and not muted), test the proximity sensor by making a phone call. Once the call all starts ringing, put your thumb across the top of the screen, the screen should go blank. This means that the proximity sensor is working and is in the correct location.
Possible iPhone 7 Proxy / Camera Flex Issues / Problems
If the screen does not go blank:
- Disconnect the battery and disconnect the proxy / sensor flex and then reconnect it. Reconnect the battery and re-test.
- If the proxy / camera flex is still playing up, test the proximity sensor when it is off the screen
- Disconnect the battery, remove the iPhone 7 Proxy Flex from the screen, reconnect the battery
- The sensors may not be properly aligned I the screen. Make a phone call and put your thumb across the proximity sensor
- If the proximity sensor is still working you can reseat it and reconnect it to the phone as per our previous steps, but pay special attention to the sensor alignment in the brackets.
If the iPhone 7 Proximity Sensor is not working you have:
- Either damaged it or;
- There is a problem with the connector or;
- The connector can be damaged or;
- There may be dirt either on the connector or the connector block or;
- Lastly the connector is bent
You may need to buy a new proximity sensor cable. If the phone takes a long time to boot/ start, this usually means that either the proximity sensor cable, screen or the home button is damaged.
On the Home Straight
Once you have the proximity sensor working and you have attached the screen with the battery connected and everything is working 100% it is time to install the proxy / camera flex bracket and the battery securing bracket. Remember, the screws need to go back in the same place they came from. Now note that at the top of the screen where the proxy / camera flex cable is, there are some plastic clips on the underside of the top of the screen. These need to be clipped into the phone first. Once in place, the screen can be lowered and the side clips gently snapped into place. Lastly install the 2 pentalobe screws and hey presto you are done.
If you are interested, we provide a Mobile Mobile Repair Business as in We Come To You, we only charge £15 for call out and we cover Bristol, Bath, Keynsham and Portishead. If you are wondering what is an iPhone 7 Screen Repair / Replacement Cost or if you have the iPhone 7 Plus, check out iPhone 7 Plus Screen Repair / Replacement Cost. We also give discounts if you do both an iPhone 7 Battery and Screen Replacement. Here are some search terms to help you find a local Mobile Repair Shop, search for “iPhone 7 Screen Repair / Replacement Near Me” or “iPhone Screen Repair Near Me


